Thursday, May 23, 2013

HOW TO: Korker Bows

What you will need:
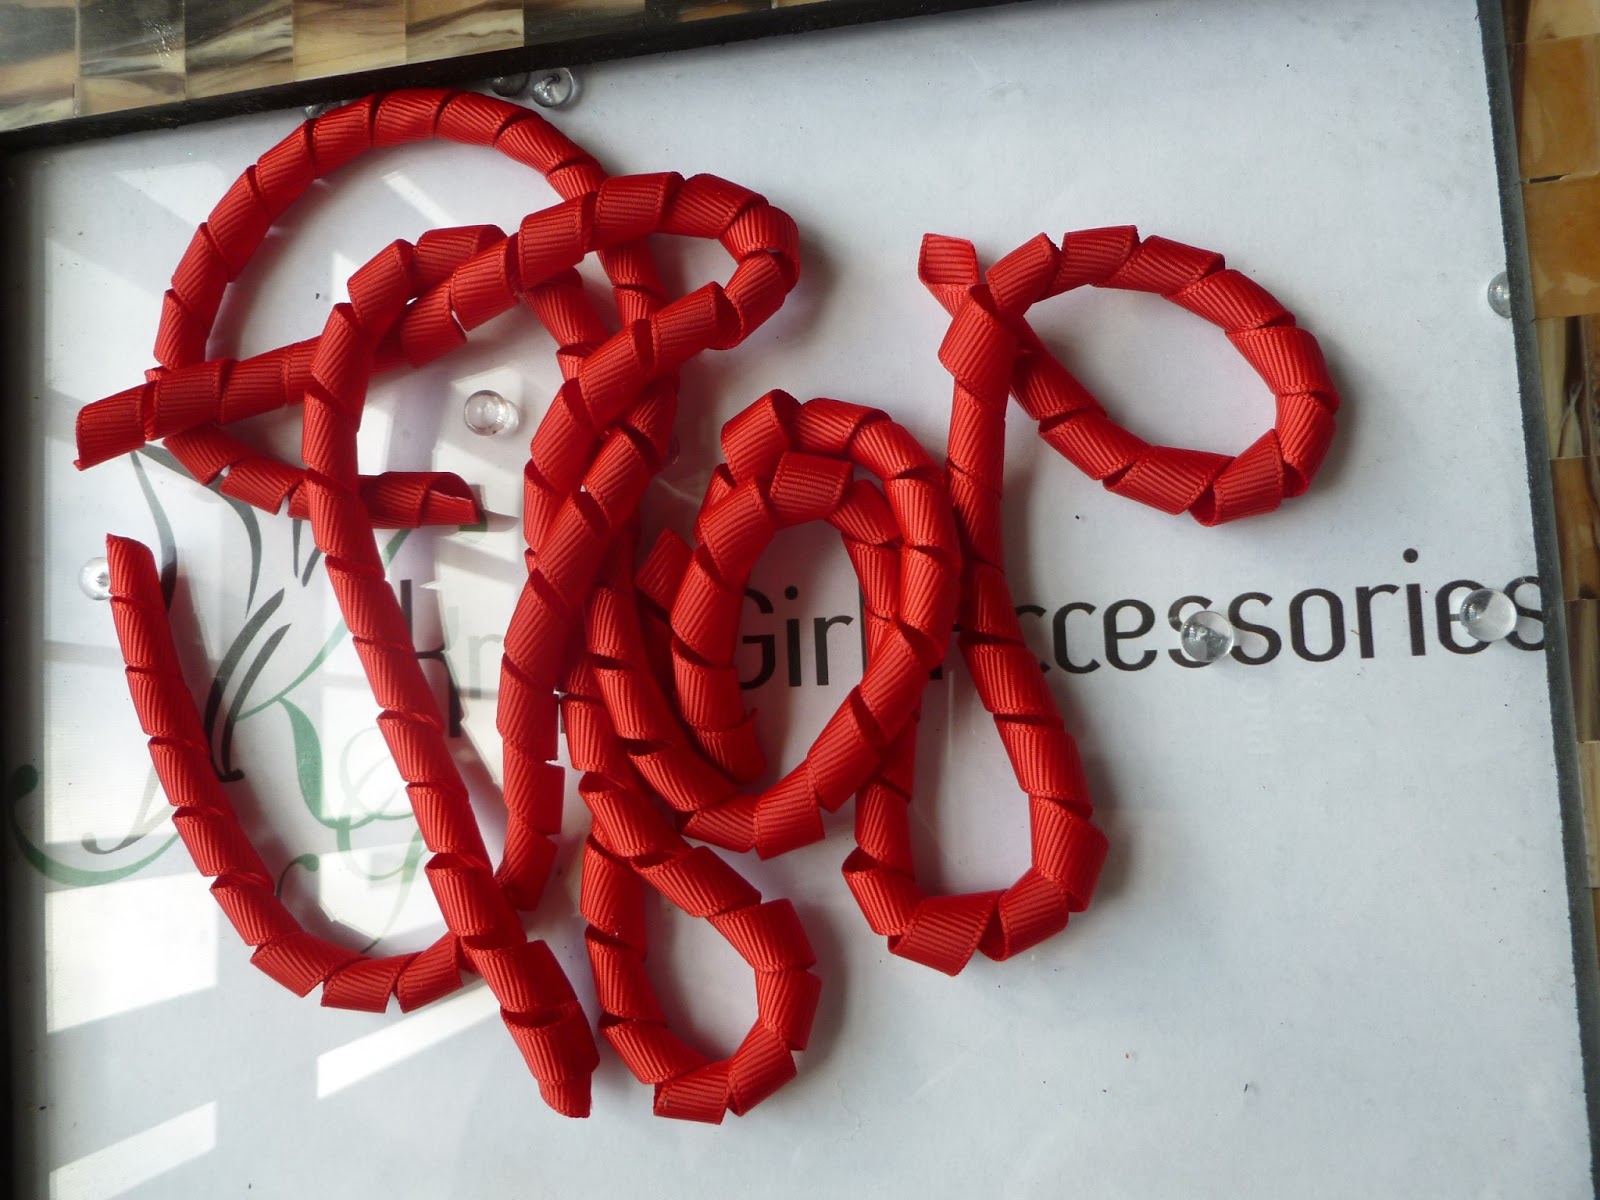
-Curled Ribbon (3/8" for this tutorial, but you may use smaller/larger. See Curled Ribbon tutorial if needed)
-Measuring Tape
-Needle and High Quality Thread (some people use embroidery floss, whatever works for you)
-Clip & Hot Glue
-Lighter (or other means to seal edges)

1} Choose your color(s) ribbon that you will be using and cut to size. {At this point you can heat seal your ends or you  can wait until your bow is finished. I like to heat seal now. Heat sealing prevents fraying. To do this, lightly run the cut edge of your ribbon close to a flame {Not too close                      
or your ribbon may burn.} If you want a small puffy korker you can cut your ribbon pieces to about 2" each, for a larger bow your pieces can be longer. The more pieces of ribbon you use the more full your bow will be.


2} Put your ribbon together. I arrange my ribbon in the order I want then thread them through the center, one on top of the other, until all ribbon is used. Once I have used all of my ribbon, I pull my thread all the way through. I then like to push the needle back through my ribbon and tie a knot at the same spot I started. For me, this gives the bow extra strength and hold, I know that it is not going to coming apart. I then like to dab a little hot glue onto my knot, this helps me to feel like the thread is "sealed". By no means is this the tride and true way, or the only way to make a korker. I have seen people make them several different ways using different materials. This is what is most comfortable for me and gets me the results that I want. I encourage you to find what works best with you, gets you good results, and go with that.


3} Choose you clip type. If you are going to use a french barrette you can simply glue it to the underside of the bow. If you are going to use an alligator clip you will need to line the clip first, then glue to bow. You can also attach these to ponytails holders and snap clips. There are many different things you can do with korkers, you can even add embellishments to the center.

4} Fluff and arrange your bow to achieve your desired look. Once finished you may want to starch your bow using spray starch (the same as you would use when ironing- who does that?!? not me; anyway, just spray the starch on and allow to air dry) to guarantee that your bow keeps the curl and shape that you want.


* Below I have included some other ideas/versions of korkers that I have made.

I hope this has been helpful! Happy Making!


Visit my Etsy shop to see more:

SHOP: 10%OFF SALE

Until May 31, 2103 my entire Etsy shop will be 10% off, including Made to Order items!


Stop by the shop for some great items! And as always domestic shipping is free with a purchase of $25 or more (use code FREESHIPPIN25 at checkout)!

CRAFT: Crayon Rounds


The kids and I just made these cute crayon rounds to use as an activity at an upcoming birthday party. My daughter is a budding artist so we always have a ton of old and broken crayons around the house.
Here is how we made them:
1) Remove paper from crayons.
2) Break crayons into small pieces. I let the kids make up their own color combinations.Image
3) Put pieces into mini muffin pan (or other mold, you can even use metal cookie cutters. I do not recommend using silicone since I have read that the crayon does not easily clean off of it)
4) Bake in a preheated 275 degree oven for 10 minutes or until all pieces are sufficiently melted.
5) Remove from oven. Let pan cool for about 30 minutes.
6) Once cool, put pan into the freezer for 15 minutes.
7) Turn out onto counter covered with dish towel. The rounds will readily pop out and may chip or break if there is not a soft surface to land on.
Image
Done! We are storing our rounds in a zippered sandwich bag until the big day.

RECIPE: Good Morning Breakfast Cookies


I always worry about my other half eating a decent breakfast. He is usually rushing out the door in the mornings, if there isn't something quick and easy that he can eat on the run he usually forgoes eating breakfast all together.  These "cookies" are a great, easy go-to for those rushed mornings.
3 Large Bananas, mashed
1/2 C  Applesauce, unsweetened
2 C Rolled Oats
1/4 C Soy or Almond Milk
2/3 C Raisins (or other dried fruit, i.e. Blueberries, Cranberries, Apricots)
2 Vanilla beans, scraped or 1 tsp. vanilla extract
1/4 C Wheat Germ
1/4 C Golden Flaxseed Meal or Ground Flaxseed
1/8 tsp Nutmeg
1 tsp Cinnamon
Optional :
1/2 C Lowfat Greek Yogurt, Plain or Vanilla ( I add this for extra protein)
1/4 C Demerara Sugar
1/3 C Sliced Almonds
Handfull Ghirardelli Chocolate Chips
1)Preheat over to 350.
2)Mix all ingredients together in large bowl.
Image
3)Bake 20 mins. on silicone mat or foil-lined cookie sheet.
Image
This recipe makes 24 good-sized cookies. I bag them up, 3 or 4 to a bag. I usually leave 1/2 of them out for the hubby to take for breakfast during the week and freeze the rest to use later.

HOW TO: Curl Ribbon

What you will need:

-Small wooden dowels (I use 1/4" dowels, but you can use a smaller or larger size depending on  the look you are going for)
-Clothes Pins (any size will do)
-Spray bottle with water
-Ribbon (Solid/Non printed, Grosgrain 100% Polyester, 3/8" ribbon works best; other ribbons may melt, burn and/or ignite in the oven) 


1} Preheat your oven to 225 degrees.


 2} Wrap your ribbon in a single layer around your wooden dowel and secure ends with clothes pin.


3} Using the spray bottle, generously spray the water over ribbon and clothespins. If you don't have a spray bottle handy, you can use the spray nozzle on your faucet.


4} Put ribbon on clean cookie sheet or line your oven rack with foil and place directly on the rack.


5} Leave ribbon in oven for 10-15 minutes or until completely dry. This time may be more/less depending on how wet you got your ribbon, especially when using your faucet nozzle, so be sure to keep an eye on it. (*When the ribbon is dry I usually turn the oven off and leave the ribbon in the oven until cool, but this is not a necessary step)


6} When ribbon is cool to touch, gently unwrap from dowel. And there   you have it, curled ribbon! 


(*Note: You can use spray starch (like what you would use on a shirt you are ironing) on your ribbon pieces to ensure they keep their shape, this is especially useful when making korker hair bows. You can also starch the whole bow when it is fully made. Simply lay bow or bow pieces onto foil or paper towels, spray with starch, and leave to air dry. When fully dry ribbon pieces, or bow, will be more stiff and will hold shape very well and after many uses.)


Wednesday, May 22, 2013

RECIPE: Lettuce Wraps with Ground Turkey


What you need:

For Wraps:
Ground Turkey, Lean
2 tbsp. Sesame Oil
2 tbsp. Grapeseed or Olive Oil

1/4 C. Scallions or Green Onion, chopped
1/3 C. Carrots, Shredded
1/2 C. Green Pepper
1/4 C. Red Pepper
1/4 C. Yellow Pepper
1 Can Baby Corn, drained
1 Can Water Chestnuts, drained
1 tsp. Garlic, minced
3 tbsp. Soy Sauce, Low-Sodium

1 Head Lettuce (works best with Iceburg or Boston Bibb lettuce)
1/2 C. Peanuts, unsalted, crushed

For Sauce:
4 tbsp Soy Sauce, Low-Sodium
1 tsp. Sesame Oil
1 tbsp. Rice Vinegar (White or Red; note: NOT red WINE vinegar)
1 tsp Ginger, Minced
2 tsp. Scallion or Green Onion, chopped
pinch sugar

Prepare sauce first to allow flavors time to combine. Mix all ingredients well in small bowl, mix well before serving. A little of this sauce goes a long way.


1) Brown meat in medium/large skillet on medium heat.
2) Stir in carrots, peppers, baby corn, water chestnuts, garlic and soy sauce. Turn heat to Low while prepping lettuce and peanuts, stirring occasionally.
3) Cut bottom core off of lettuce, this will allow you to peal off the leaves whole. You can also cut the whole head of lettuce in half to make smaller "wraps". Rinse leaves and pat dry with paper towels, set aside. Crush peanuts and set aside. {To crush peanuts you can use a food processor, or a mortar and pestle, or you can do what I usually do (use two heavy, different size bowls that fit nicely into each other, push down the smaller bowl to "crush" the nuts at the bottom of the larger bowl)-see photos below}

 4) Scoop small amounts of meat onto lettuce leaves, just as you would do for a soft taco, and wrap up or just fold like a taco shell. Dip wraps in sauce (or pour small amount of sauce over meat before eating).